

Step 1
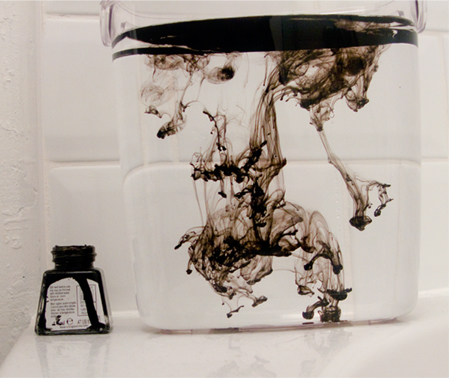
The first and probably most fun part of this tutorial is to photograph the ink drops. Get some Indian ink and any type of clear container (I used a food container). Fill the container with water, then drop in the ink and snap away.
Tips: Constantly take pictures while the ink drops, as the shapes will change considerably over time. Photograph the ink drops in front of a white background to produce clearer pictures. Experiment with dripping the ink using pipettes and any other device you can get your hands on.
If you don't have access to ink and a camera then check out these images: 1, 2, 3, 4, and 5. Feel free to experiment with the ink drop images, but do pay attention to the usage license.
Step 2
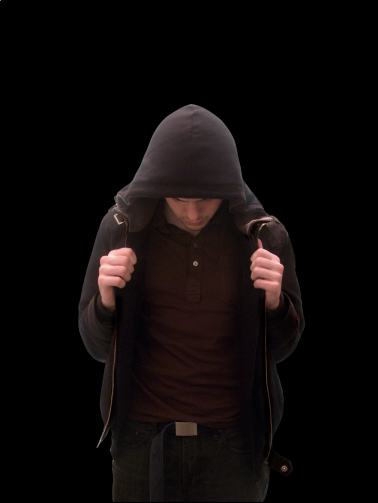
Open a new document, set the background to black, and import the main image you want to use. I used a self portrait that I photographed myself. Cut out the image you'd like to use in your composition. After removing the background, we'll be able to focus on integrating the ink into the design.
Step 3
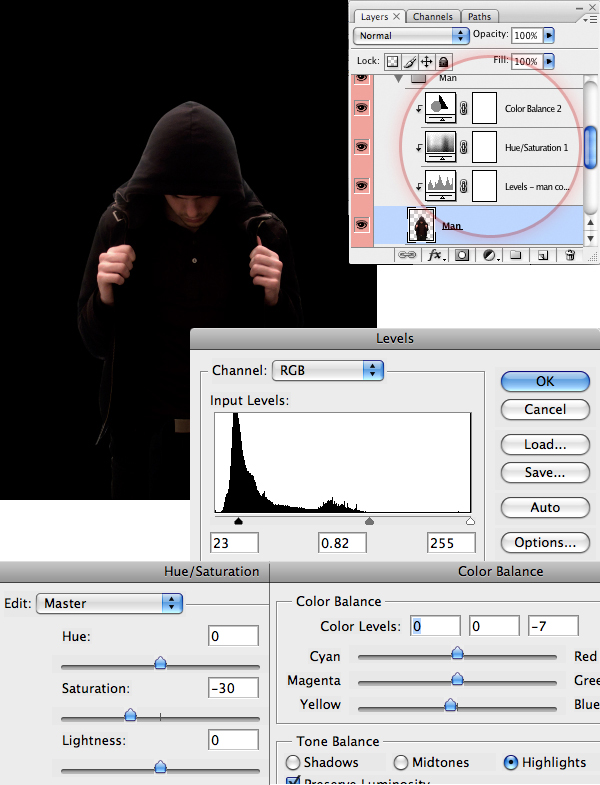
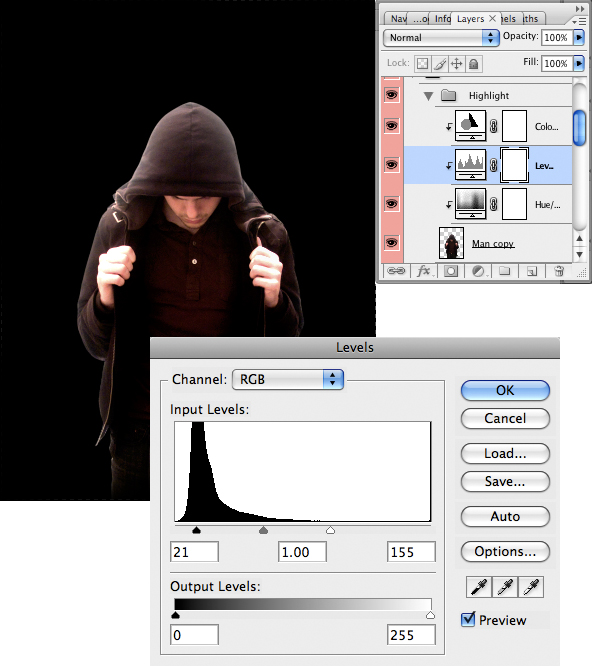
Adjust the levels and colors of the image using the Adjustment Layers (Layers > Create New Adjustment Layer). Using Adjustment Layers gives us greater freedom in case we need to undo something later on. Make sure all the Adjustment Layers are just above the "Man" layer. Then select them all, and create a Clipping Mask by right-clicking on them, and selecting it from the menu.
Use Levels to help create a darker, more subtle image. Also, use Hue & Saturation and Color Balance to subdue the colors and give the "Man" a tone with more yellow. Don't worry if the image looks dark at this stage, just make sure the hands stand out.
Step 4
To give the image a more defined look, we are going to add highlights. Put the "Man" layer and its Adjustment Layers into a folder. Then duplicate it. Change the Levels on the new Adjustment Layer so that the edges of the man's jacket are well defined.
Step 5
Add a Layer Mask to the layer of the "Man" by clicking on the Add Layer Mask Icon at the bottom of the Layers Window. Make sure the Layer Mask is black (which will make the layer disappear).
We are now going to bring out the highlights we want, which is mainly the prominent edges of the coat. Select the Layer Mask and draw over the parts you want to make brighter with a soft white brush.

Step 6
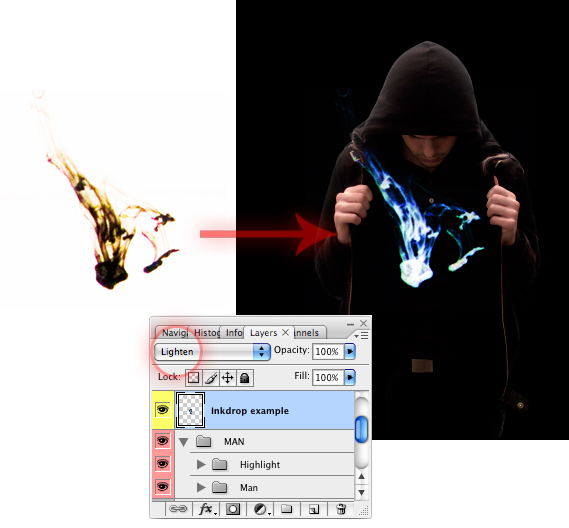
Its now time to select the ink drops we want to use inside the "Man." This can be as intricate as you want, however try to have a good idea of what you want the final piece to look like before you start. Once you have found an ink drop you want to use, copy and paste it into the current document.
Color doesn't matter at this stage; just pick the ink drops that have the best shape. Press Ctrl+I to invert the image, as the ink drop image will be on a white background. Then in the Layers Menu, change the Blending Mode of the ink drop layer to "Lighten", and resize the layer as necessary.
Step 7
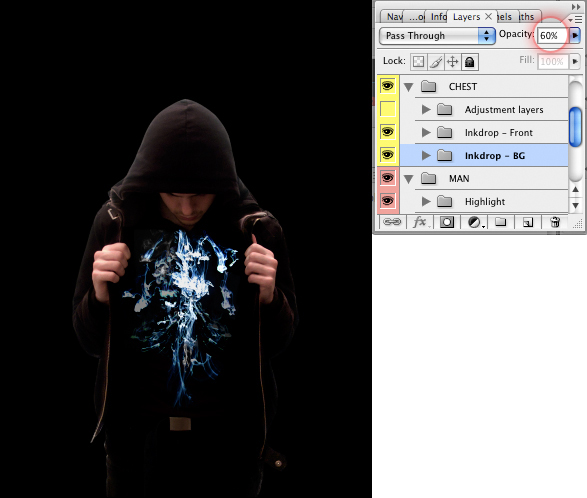
Once you've placed all your drops, make two folders called "Ink drop - Front" and "Ink drop - BG," as we want to give some simple depth to the ink drops. Carefully choose the ones you want in the foreground and the ones you in the background. Then put the layers in the corresponding folders. Now select the "Inkdrop - BG" folder, and set the Opacity to 60%.
Step 8
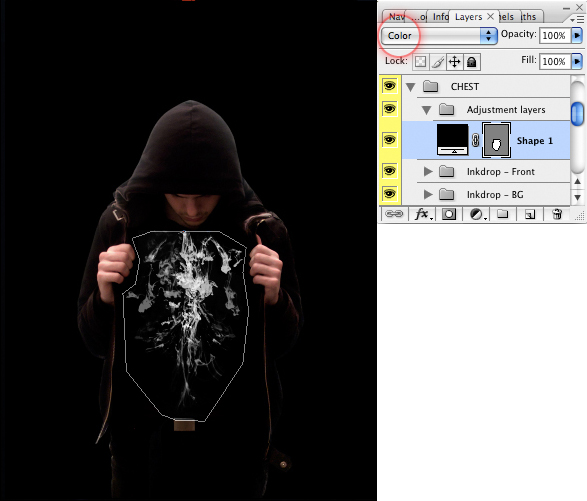
We are now going to color the ink drops we have introduced. Use the Pen Tool to draw around the inside of the "Man," not including his hands or his face. Set the color of this layer to black. Then set the Blending Mode of this newly made layer to "Color," which will desaturate the ink drops.
Step 9
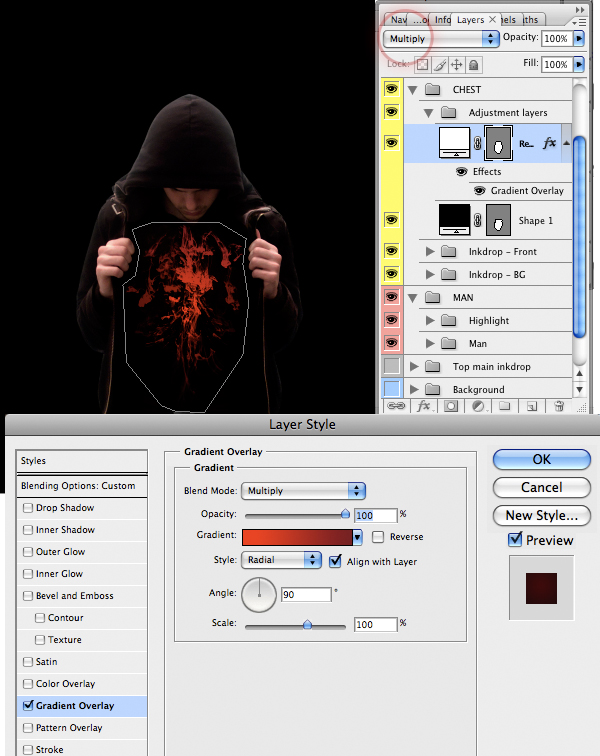
Duplicate the previous layer, and double-click it to bring up the Layer Styles Dialogue. Click Gradient Overlay and change the style drop down to Radial. Make the left hand color #cf2727 and the right hand #652727. Set the Blending Mode of this layer to Multiply. This step will create the impression of a glowing center in the image.
Step 10
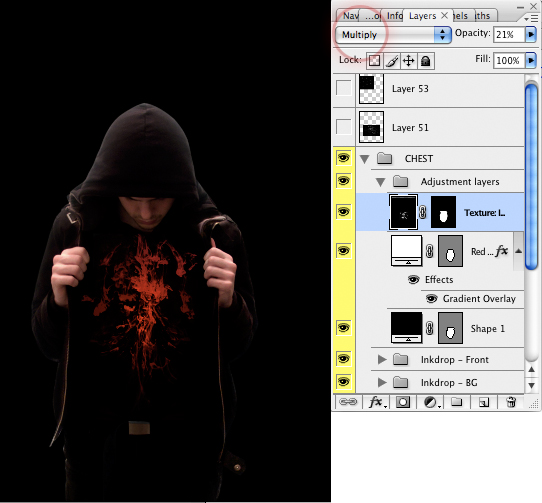
You may find that the ink drops look quite flat now, so we need to add a bit more texture. Select one of your more intricate ink drops, desaturate the whole picture (Image > Adjust > Desaturate). Import it into your main image. Then resize it to cover your red ink drops.
Step 11
Change the Blending Mode of the layer to Multiply and the Opacity to around 20%. Ctrl-click on the previously made Layer Mask on the Color Layers. Then click back onto your new texture layer. Click Add New Layer Mask at the bottom of the Layers Panel. This will create a Mask around the image just in case you went over the edges.
Step 12
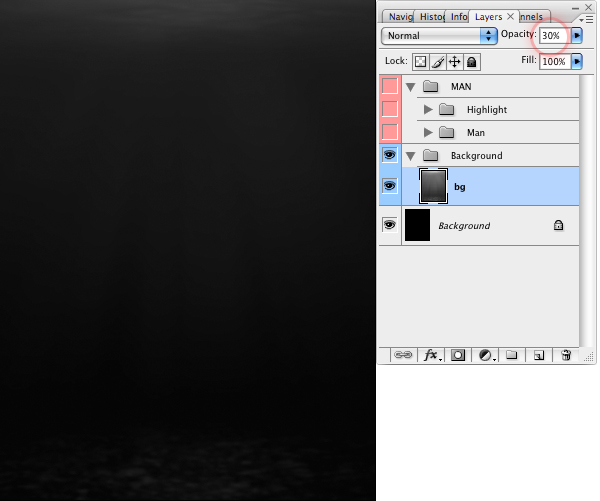
Now that we have the inkdrop sorted, let's start on the background. I used a stock image from Stock.xchng to give the background a bit of texture. You can download it here.
Desaturate the image and import it into Photoshop below the other layers. Change the Opacity of it to around 30%. Resize the photo so it touches the edges of the document. I also blurred the image slightly using Gaussian Blur (Filter > Blur > Gaussian Blur).
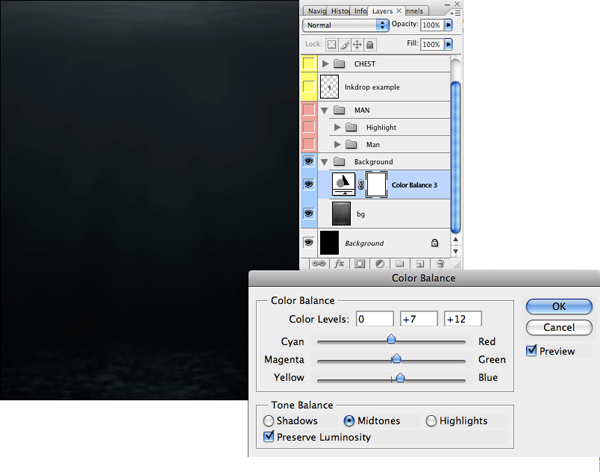
Step 13
We are now going to Add a tinge of blue to the background. Add another 'Colour Balance' adjustment layer (Layer > Create New Adjustment Layer) and and a hint of both blue and green.
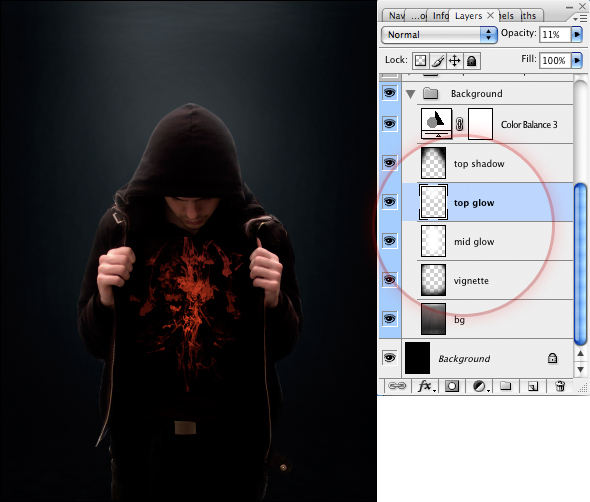
Step 14
To help give the piece some mood, use a large soft black brush to draw a vignette around the outside of the image. Then use a soft white brush to add a glow behind and above the "Man." Make sure to be subtle at this stage, as you want it to look as natural possible.
Step 15
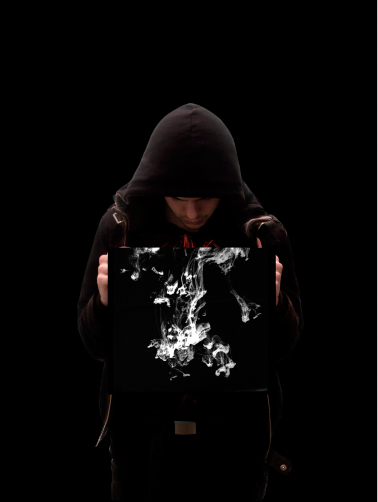
We are now going to produce the inkdrop background. First, draw a black triangle, as seen in the image below.

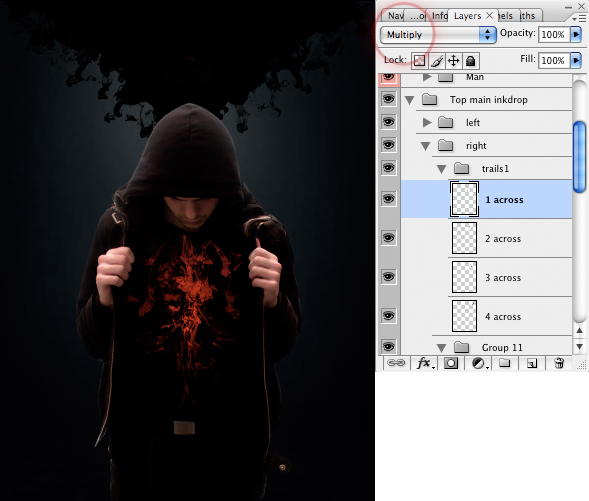
Step 16
Next, paste the ink drops in you want to use. Change the Blending Mode of the layers to Multiply, so we are left with just the black of the images. This again is about choosing the right drops for the best composition.
Step 17
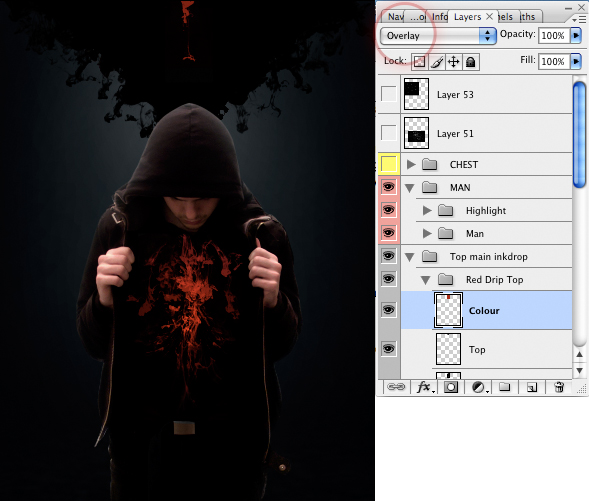
We are finally going to add the red inkdrop falling from the top. Choose the image you want to use. Then import it to the main document, using the same techniques as in Step 6.
Create a layer, and using the Rectangular Marquee tool drag a rectangle that covers the single inkdrop. Draw a rectangle over the inkdrop you just chose. Fill the rectangle with the color #912020. Then change the Blend Mode of this layer to Overlay.
Step 18
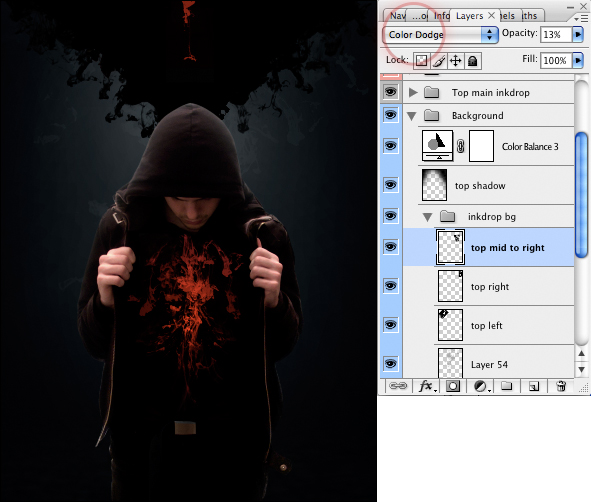
Now it's time to do a few finishing touches to the image. Add a few final white ink drops to the main background using the same techniques as before. However, make sure that the layers are desaturated, faded, and the Blend Mode set to Color Dodge.
Step 19
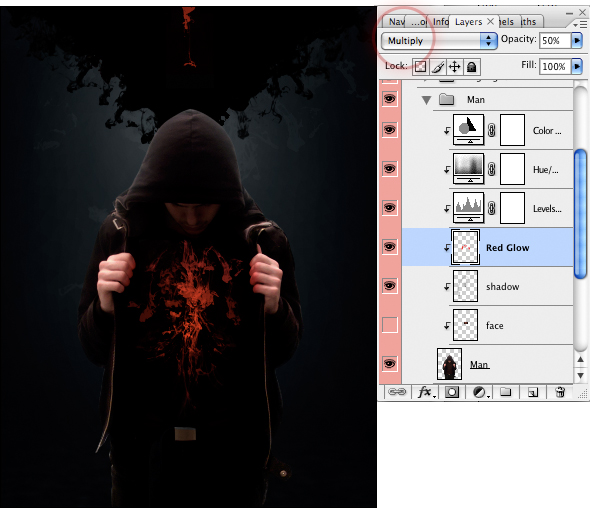
Decide whether you need to darken or colorize any parts of your main image. Then create layers accordingly. I decided I wanted the man's hands to glow from the red ink, so I drew over the hands with a soft red brush. Then set the Blend Mode to Multiply. Also, I added a few shadows and blue hues.
Step 20
Finally, adjust the brightness and color of the overall image by using an Adjustment Layer at the top of the document (Layer > New Adjustment Layer). Then I added a Brightness/Contrast to lighten the image, as shown below.

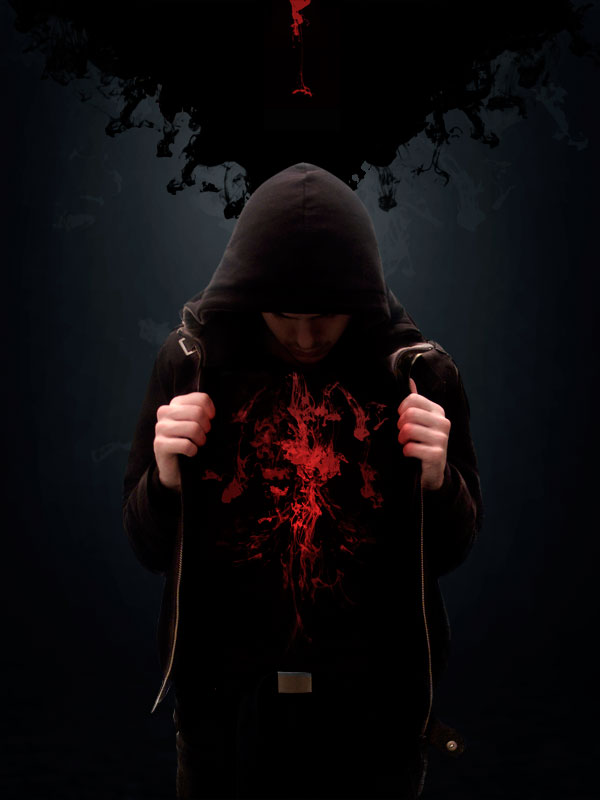
Final Image
The final composition is below.

Post a Comment